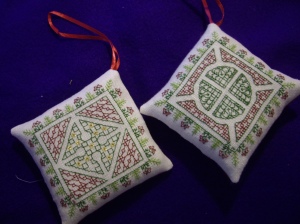
Lets start things off with a bang shall we? My current obsession is making Christmas ornaments, and I’ve spent a good amount of time scouring the web for ideas on how to finish them. My favorite method right now is a simple pillow ornament with a ribbon hanger.
Lets get started shall we?

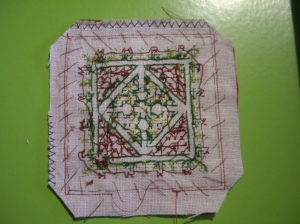
Decide how much of a border you want around your ornament, and baste a border around it that is just a little bit smaller than the finished ornament size. Here I decided to leave a border of 10 threads, so my basted outline was 8 threads away from the edge. This border serves as a guide for the actual stitching – it is much easier to get all your counting done ahead of time rather than fiddling with counting threads while your ornament is under the foot on your sewing machine.
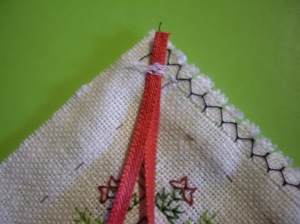
After basting, cut the ornament out, leaving approximately 3/4 of an inch of fabric beyond the basting line. Cut a length of ribbon for the hanger, and folding it in half, tack the cut edges into place on the right side of the ornament with a few stitches, sewing it outside of the basted outline. These stitches will end up inside the seam later, so don’t worry about being neat. The goal here is to tack down the ribbon so that you’re not fiddling with it later during assembly when you’ve got other things going on.
Lay the ornament and backing fabrics right sides together now so that the ribbon is sandwiched between them. Making sure that the ribbon is clear of the edges, make several large basting stitches all around the ornament. You could choose to pin the layers together, but every time I do that I end up stabbing myself. I prefer to baste all around the edges to make sure that the fabric doesn’t shift as I sew. I also don’t cut my backing fabric down to size until later, so that there’s no risk of a measurement gone wrong.
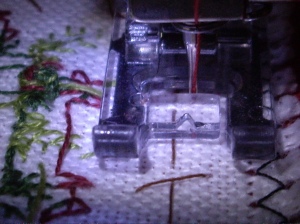
Now we get to sew! I sewed these ornaments on the machine, going very slowly to make sure that I was always stitching 2 threads away from my basted guide. You could also sew by hand, using a backstitch. Start your stitching just before the corner on the bottom edge of the ornament, then sewing to the edge, around the three other sides, and back down to the bottom again, ending with sewing just a little bit past the corner. This will leave a gap along the bottom that is used to turn the ornament right side out and stuff it. Don’t forget to reinforce the starting and ending point with a couple of back stitches or locking stitches if your machine has them.
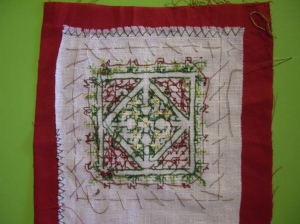
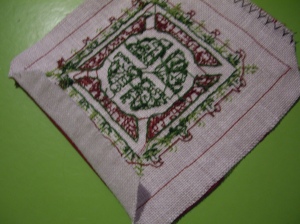
Once the sewing is done, trim the excess backing fabric off all 4 sides, and cut the corners at an angle to reduce the bulk in the seams. Just don’t get too close to the stitching line or things may start to unravel! In the image above you can see that about 1/3 of the bottom seam isn’t stitched.
Next, snip the basting stitches carefully and remove them. A pair of tweezers comes in handy at this point! Lay some scrap fabric over the ornament and iron it to smooth out any wrinkles. Then fold the bottom seam (the one with the gap in it) open and iron. This puts a crease in the fabric along the seam, making it easier to see where you need to place your stitches later when you are sewing the gap closed.
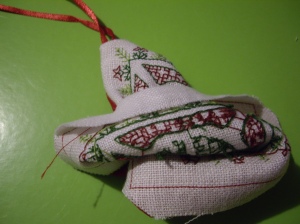
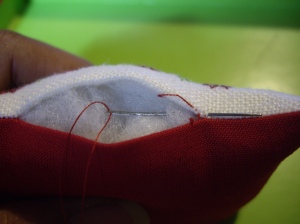
Now for the tricky bit! Reach into the opening and find that ribbon that is attached to the seam. Pull it out carefully so that it brings the fabric it is attached to with it, then start working the fabric through the gap bit by bit. until the entire ornament is right side out At first it may seem like it’s impossible, but rest assured it will. Just be careful not to put too much stress on the edges of the opening or the stitches may pull at the fabric.
Use a small slightly pointed implement – a small crochet hook is my tool of choice here – to push out the corners and get them as pointy as possible. At this point I like to iron the ornament once again (covered with a piece of scrap fabric of course!) to make sure everything is smooth and flat.
Fill the ornament with a stuffing of your choice. I like to use fiberfill. Once again, I use my crochet hook to push small bits of stuffing into each of the corners to make sure they keep their shape before stuffing the rest of the ornament. Attach your sewing thread by putting a knot in one end and coming up from inside the ornament into the seam so that the knot is hidden in the fold of the seam.
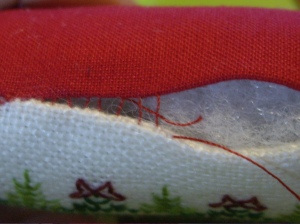
Sew the opening closed using a ladder stitch, catching just a few threads on each side in turn. This is where that seam you pressed open earlier comes in really handy as there is a sharp crease to follow as a guide for stitch placement. Tug the thread gently to close up the stitches and..
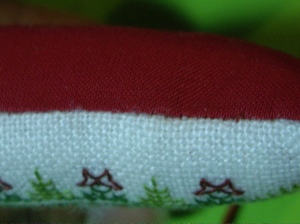
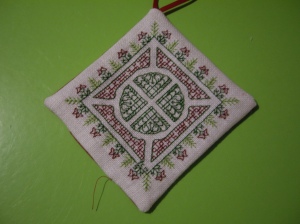
Tadaa! They disappear! Once you reach the end of the gap, finish by taking several small stitches in one spot, then pushing the needle into the ornament and coming out about an inch away from the seam. Tug the thread tight and cut close to the ornament so that the tail vanishes back inside.
Congratulations, you’ve just finished an ornament! I hope that you found this tutorial useful, and would love to see pictures of ornaments you finished using this method. If you have any further questions or need me to clarify any part of my instructions, please leave me a comment below.
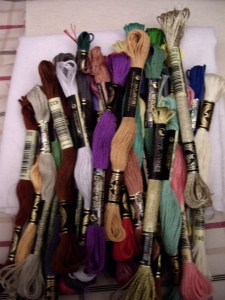
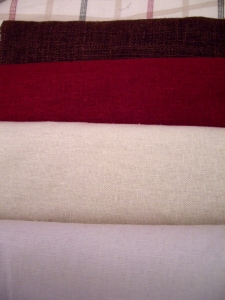 So.. what did I buy in January? JoAnn was having a sale on floss at the start of the year, so I took advantage to buy floss for a few upcoming projects that I have planned. While I was in JoAnn, I wandered through their fabric department and found several bolts of linen. I have no idea if these linens are evenweave or not, but I bought an 8 inch cut of a few different fabrics to play with. One of these days I’ll actually pin them down and count the threads per inch to see how close to square they are and do a bit of test stitching to see how well they will well for cross stitch. From top to bottom is a brown slightly slubby linen, a red and ivory smooth linen, and a pure white linen.


