Keeping my floss organized when I work is always a challenge. I mean there’s the regular floss, there’s cut lengths of floss, there’s cut lengths that have had a few strands removed to stitch with, and there’s shorter lengths left over after stitching parts of the pattern that need to be held on to until the color is needed again. And all of these need to be kept organized in some way so that I’m not left looking at 2 shades of yellow floss trying to figure out which is which. This has lead to my creating a few different variations of my own floss cards to try to stay on top of things.
When I recently agreed to complete the Dimensions Baby Drawers Birth Record for someone I will admit, I was a bit worried. First of all, I hate working from kits because before you can even start stitching there’s all that floss to organize. Then in this case, because the kit was already partially stitched, the floss would have been organized by someone else! Who knew what method they would use? I was greatly relieved to find out that the kit came with floss already organized, but I knew I’d still have to find a way to deal with all the partial strands and shorter bits as I worked.
Turns out I had nothing to be worried about. The Dimensions floss organizer is nothing short of brilliant. I don’t know if their design was intentional, but with a quick couple of tweaks it worked perfectly for everything I wanted, and more!
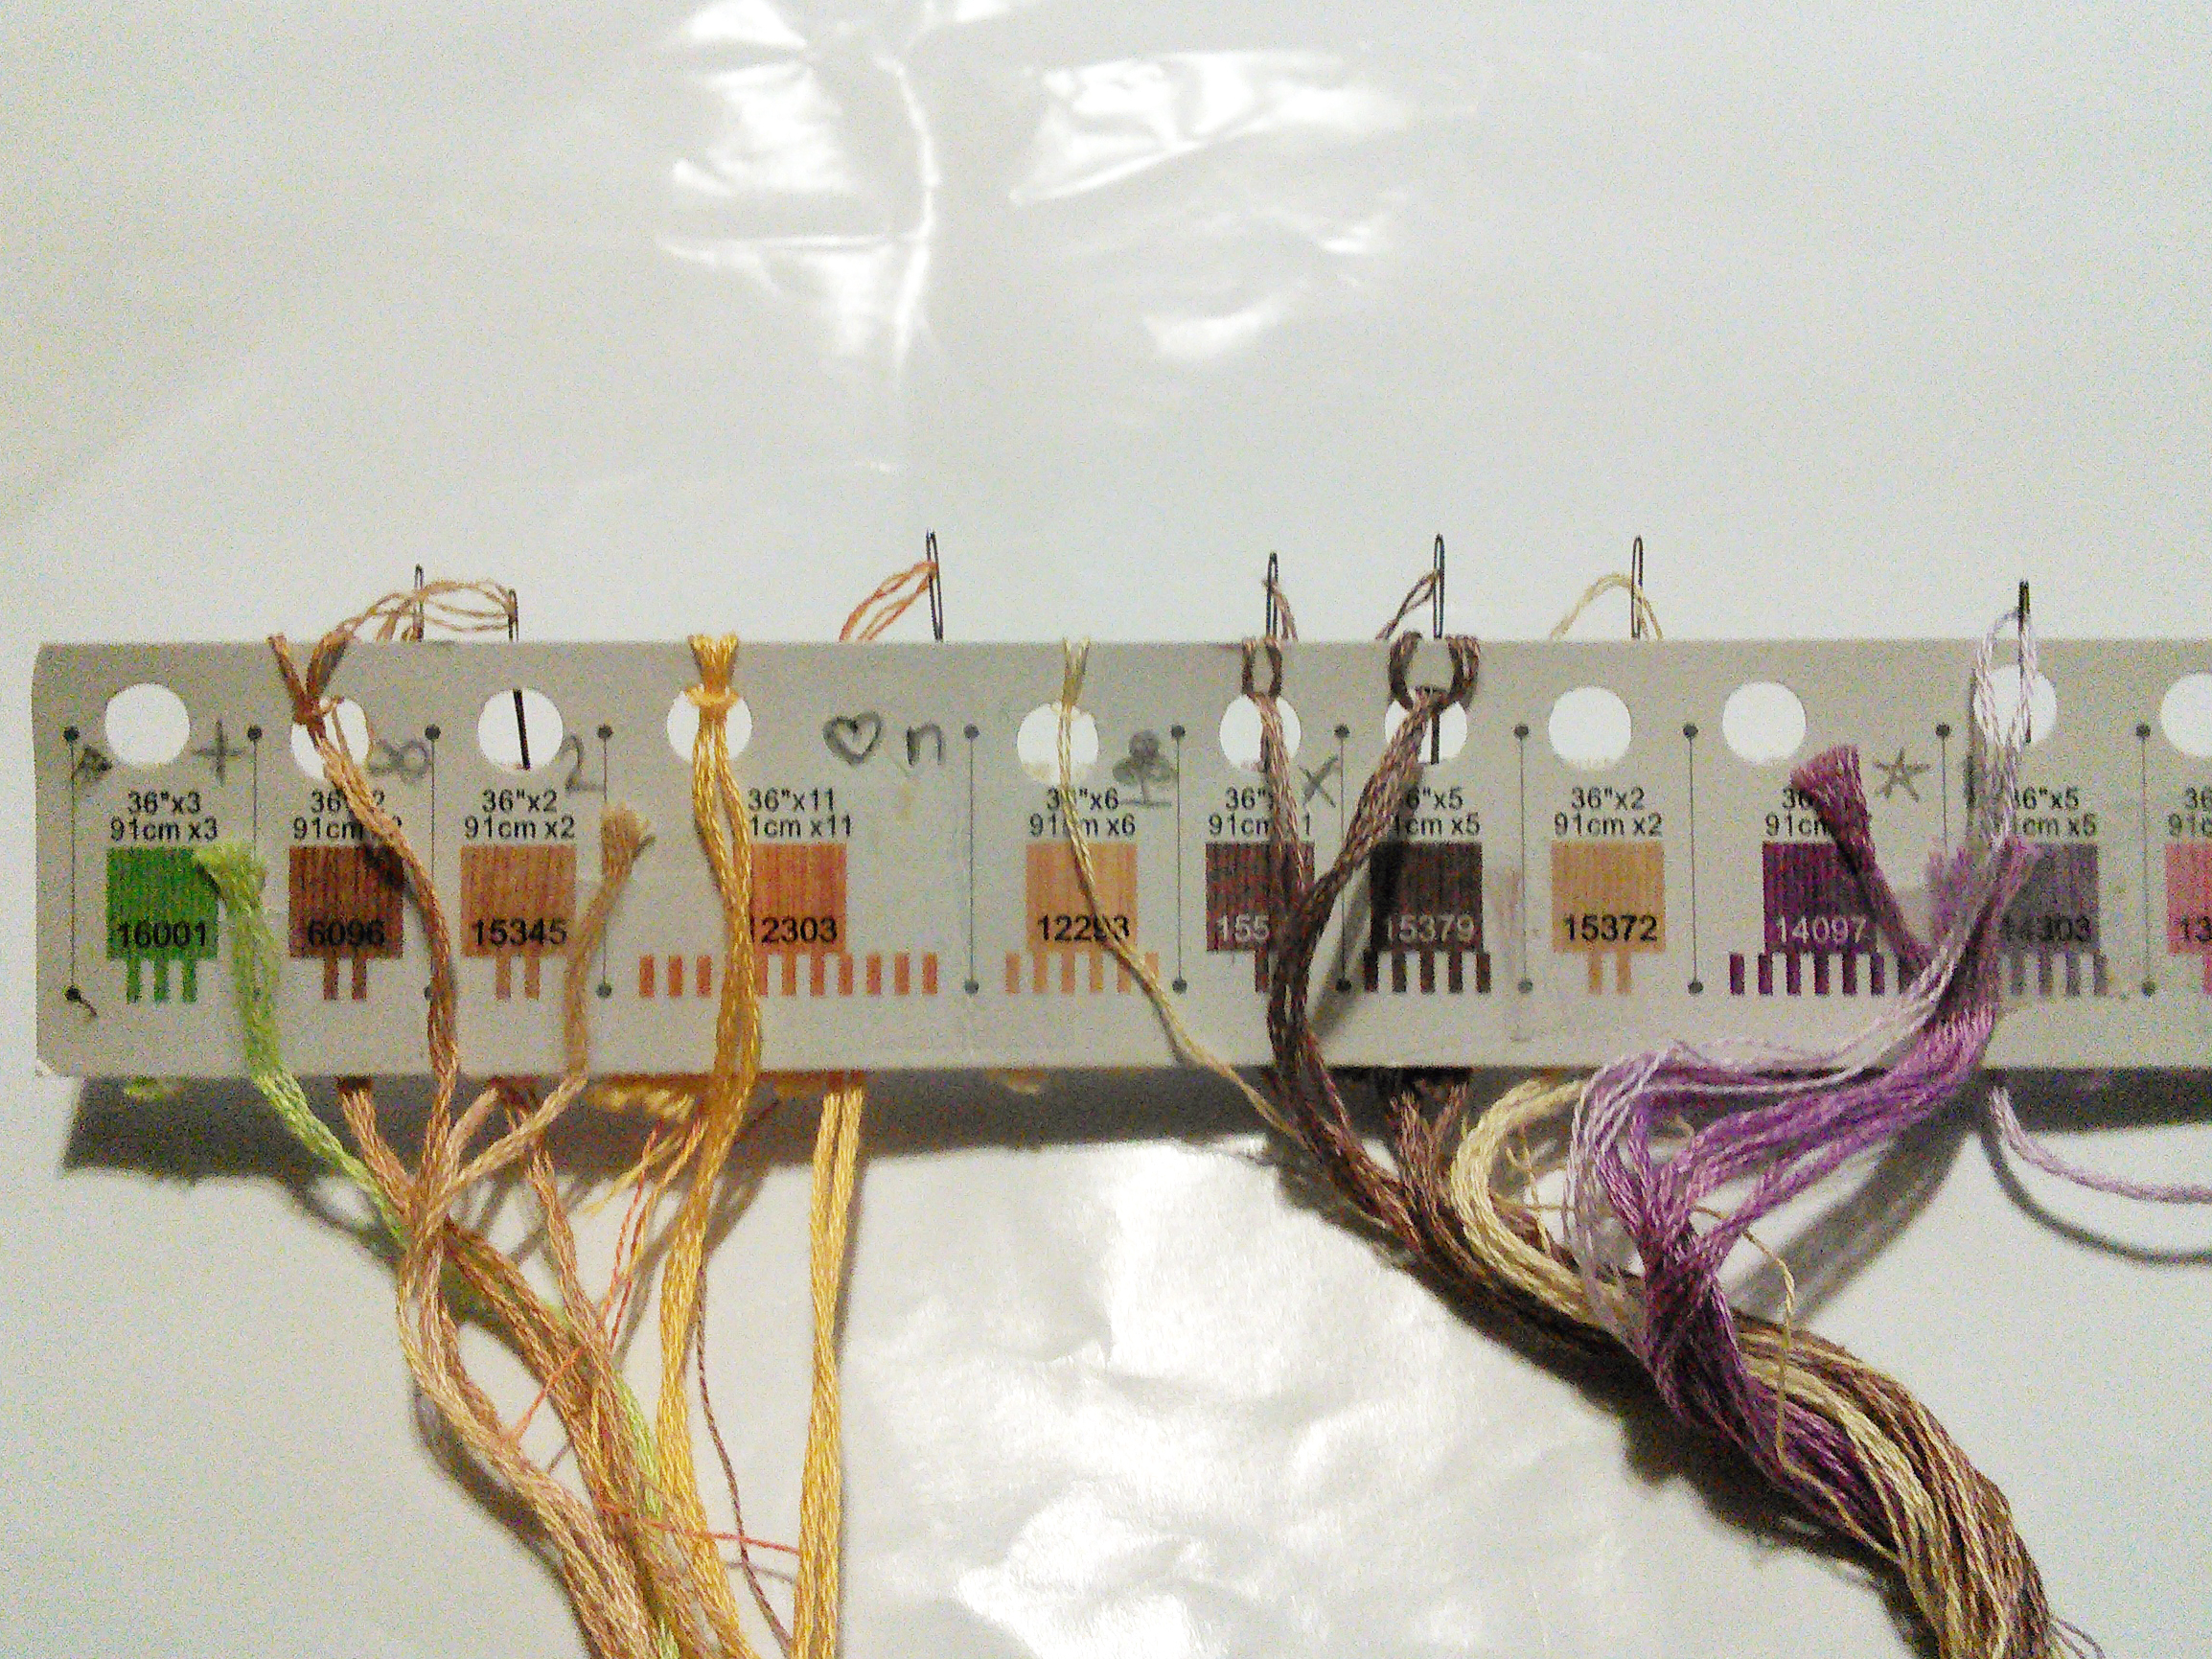
The organizer is quite simple actually. Cut lengths of floss held between two strips of heavy cardstock with a strip of foam tape between them, with the information about each color on the front piece of cardstock. The kit arrived in my hands with the partially stripped lengths of floss taped to the front of the organizer and for about 0.2 seconds I considered continuing that before I reached for my hole punch. The back strip of cardstock is shorter than the front, so I punched a hole above each color swatch to hold any bits of floss that had been removed from the organizer. I also drew each symbol right onto the organizer so I wouldn’t have to keep reaching for the sheet that the key was printed on. The real genius of the organizer didn’t occur to me until after I’d started stitching. There I was, a still threaded needle holding a leftover length of floss in hand, when it occurred to me that the foam between the two strips of cardboard would be the perfect place to park my needle. Sure enough, it was just right and next thing I knew I’d pulled out my stash of needles and was leaving each color still threaded on the needle when I was done with it so I could just grab it and continue the next time the color was needed.
Now I’m thinking about using this idea in my other stitching projects – especially my HAED where having a needle pre-threaded with each color in advance would make such a huge difference in the amount of time I spend fussing with my floss. I am definitely going to have to play with this and see what I come up with. It’s a good thing I just ordered a bunch of needles recently!


I do the same thing with the symbols when I’m stitching from someone else’s pattern! Having your needles threaded must be such a time saver.
Oh what a great idea!! 🙂
Great idea! I have a dimension kit for the bibs and yesterday I was wondering about how to keep the needles and threads in use! 🙂